Welcome to Starkli
Starkli is a command line tool for interacting with Starknet, powered by starknet-rs.
Starkli allows you to query Starknet and make transactions with ease. It's fast, easy to install, and intuitive to use.
Installation
The easiest way to install Starkli is to use starkliup, a portable script that downloads prebuilt binaries and manages shell configuration for you. However, it might not be available depending on your device's platform and/or architecture.
Note that if you use any installation method other than starkliup, you will need to manually set up shell completions.
Using starkliup
If you're on Linux/macOS/WSL/Android, you can install starkliup by running the following command:
curl https://get.starkli.sh | sh
You might need to restart your shell session for the starkliup command to become available. Once it's available, run the starkliup command:
starkliup
Running the commands installs starkli for you, and upgrades it to the latest release if it's already installed.
starkliup detects your device's platform and automatically downloads the right prebuilt binary. It also sets up shell completions. You might need to restart your shell session for the completions to start working.
ℹ️ Note
Over time,
starkliupitself may change and require upgrading. To upgradestarkliupitself, run thecurlcommand above again.
Prebuilt binaries
Prebuilt binaries are available with GitHub releases for certain platforms.
Prebuilt binaries are best managed with starkliup. However, if you're on a platform where starkliup isn't available (e.g. using starkli on Windows natively), you can manually download the prebuilt binaries and make them available from PATH.
Install from source
If you have Rust installed, it's also possible to install starkli directly from source. Installing from source might be necessary if you want to use an unreleased feature, for example.
ℹ️ Note
Shell completions would not be configured when you install
starklifrom source. You need to manually set up shell completions for it to work.
To install from GitHub:
cargo install --locked --git https://github.com/xJonathanLEI/starkli
ℹ️ Note
It's not recommended to install Starkli from crates.io, as Starkli is no longer published there there after v0.1.8.
This is because Starkli uses Git dependencies due to the need to bundle multiple SemVer-compatible versions of the Sierra compiler.
Shell completions
Automatic shell completions are critical to good user experience for CLI tools. Starkli supports shell completions for the following shells:
- bash
- elvish
- fish
- powershell
- zsh
When installing with starkliup, shell completions are automatically set up for the following shells:
- bash
- fish
- zsh
and you don't need to configure them yourself.
Otherwise, you can generate shell completion files by running the following command:
starkli completions <SHELL>
which prints the content of the completion file to the standard output. For example, to generate the completion file for fish:
starkli completions fish
You can pipe the output into a completion file and place it at the folder expected by your shell. You might need to restart your shell session for the changes to take effect.
Providers
Starkli connects to Starknet through "providers". Many commands require a provider to be supplied.
Previously, Starkli supported using both JSON-RPC and the sequencer gateway for accessing the network. However, following the deprecation of the sequencer gateway, support for using the sequencer gateway has been dropped. Therefore, the only provider supported now is JSON-RPC.
There are two ways to specify a JSON-RPC provider, either directly or through predefined networks.
💡 Tips
Each Starkli version only works with one specific JSON-RPC specification version. To check the supported JSON-RPC version, run the verbose version output command:
starkli -vV
ℹ️ Note
When no provider option is supplied, Starkli falls back to using the
sepolianetwork. If the network is not already defined, a free RPC vendor is used.You're advised against relying on the fallback to use the
sepolianetwork, as the default network might change over time. Therefore, a warning is shown each time the fallback is used.
Using an RPC URL directly
There are a few options to obtain access to a JSON-RPC endpoint:
- hosting your own node with
pathfinderorjuno; or - using a third-party JSON-RPC API provider like Infura, Alchemy, Chainstack, or Nethermind.
Once you have a URL to a JSON-RPC endpoint, you can use it via the --rpc <URL> option for commands that expect it. For example:
starkli block-number --rpc http://localhost:9545/
Alternatively, you can set the STARKNET_RPC environment variable to make command invocations easier:
export STARKNET_RPC="http://localhost:9545/"
and then, simply run:
starkli block-number
which is the same as the running with the --rpc option.
💡 Tips
While using
--rpcorSTARKNET_RPCis convenient for one-off command invocations, using predefined networks is recommended for more complicated use cases, including the use of custom HTTP headers.
Using a predefined network
Networks can be defined in profiles. Each network is uniquely identified by an identifier within a profile. When the --network option, or the STARKNET_NETWORK environment variable, is used, Starkli looks up the network identifier in the current active profile, and uses its provider settings to connect to the network. See the profiles page for details on defining networks.
If the supplied network identifier is not found, Starkli terminates with an error, unless the network is eligible for free RPC vendors, in which case Starkli automatically creates the network and persists it into the profile.
For example, to check the block height of a predefined network mainnet:
starkli block-number --network mainnet
Alternatively, you can set the STARKNET_NETWORK environment variable to make command invocations easier:
export STARKNET_NETWORK="mainnet"
and then, simply run:
starkli block-number
which is the same as the running with the --network option.
ℹ️ Note
--rpcorSTARKNET_RPCtake precedence over--networkorSTARKNET_NETWORK. When both options are supplied,--network(STARKNET_NETWORK) is ignored, and a warning message is shown.
Free RPC vendors
Historically, the now-deprecated-and-removed sequencer gateway provider allowed new Starkli users to start interacting with Starknet without going through the hassle of obtaining a JSON-RPC endpoint. However, following the deprecation of the sequencer gateway, this is no longer an option. To maintain the same zero-setup experience, support for free RPC vendors was added.
The following 3 networks are eligible for free RPC vendors:
mainnetsepolia
When using these networks, and when the network is not already defined in the active profile, a free vendor will be used:
Once selected, the vendor choice is persisted in the profile. A message is printed to the console when this happens. All subsequent invocations under the same network use the already chosen vendor automatically.
💡 Tips
You can always change the automatically assigned free RPC vendor for a network by editing the profiles.
Profiles
Starkli supports profiles, where custom networks can be defined.
ℹ️ Note
Profiles only allow defining custom networks at the moment. More features will be added soon.
ℹ️ Note
Currently, only one profile
defaultis supported. Defining additional profiles results in an error.
The profiles file
Depending on what operating system you're using, the profiles file are located at:
- Linux and Mac:
~/.config/starkli/profiles.toml - Windows:
%AppData%\starkli\profiles.toml
💡 Tips
The profiles file is created automatically the first time you use a free RPC vendor. You can take the automatically generated file as a starting point for adding new networks.
Defining custom networks
Custom networks can be defined as <PROFILE_ID>.networks.<NETWORK_ID>. Since only the default profile is supported at the moment, networks should be defined as default.networks.<NETWORK_ID>.
Each network contains the following properties:
| Field | Mandatory | Type | Description |
|---|---|---|---|
name | No | String | Human-readable network name, currently unused |
chain_id | Yes | String | String representation of the chain ID |
provider | Yes | String/Object | Provider configuration |
Provider configuration
The provider field can be either a String or an Object. When the provider value is an Object, it must contain a type field, whose value must be one of the following:
| Value | Description |
|---|---|
rpc | Use the JSON-RPC provider by specifying an endpoint URL |
free | Use a free RPC vendor |
rpc provider variant
| Field | Mandatory | Type | Description |
|---|---|---|---|
type | Yes | String | Value must be rpc |
url | Yes | String | URL to the JSON-RPC endpoint |
headers | No | HttpHeader[] | Custom HTTP headers |
where HttpHeader is defined as:
| Field | Mandatory | Type | Description |
|---|---|---|---|
name | Yes | String | HTTP header name |
value | Yes | String | HTTP header value |
free provider variant
| Field | Mandatory | Type | Description |
|---|---|---|---|
type | Yes | String | Value must be free |
vendor | Yes | String | Must be one of blast and nethermind |
rpc provider shorthand
The provider value can also be a String. When this is the case, it's used as a shorthand for the rpc variant. So this value:
provider = "https://example.com/"
is the same as this:
provider = { type = "rpc", url = "https://example.com/" }
Example network configurations
This section contains a few example network configurations.
Network with the RPC provider
[default.networks.mainnet]
chain_id = "SN_MAIN"
provider = { type = "rpc", url = "https://example.com/", headers = [ { name = "Api-Key", value = "xxxx" } ] }
Network with the RPC provider shorthand
[default.networks.mainnet]
chain_id = "SN_MAIN"
provider = "https://example.com/"
Network with the free RPC vendor
[default.networks.mainnet]
chain_id = "SN_MAIN"
provider = { type = "free", vendor = "blast" }
Signers
Starkli uses "signers" to sign transactions. Technically speaking, a signer can be anything that can provide valid signatures for transactions. In practice, the following signer types are currently supported:
More signer types will be supported as they become available. As of this writing, the most secure signer type is Ledger hardware wallets.
Signers can be managed, or in some cases, created, through the starkli signer command.
Ledger hardware wallet
This book has a dedicated page for Ledger wallets. Learn more about managing and using Ledger with Starkli in the Ledger page.
💡 Tips
As with any other blockchain networks, it's highly recommended to use Ledger for accounts that hold a significant amount of funds.
Encrypted keystores
Encrypted keystores are JSON files that follow the Web3 secret storage definition. A password must be supplied to create a keystore, and is required for subsequently using the keystore.
⚠️ Warning
Keystores are encrypted, but they're only as secure as the password you used to create them.
To create a fresh keystore from scratch:
starkli signer keystore new /path/to/keystore
and a keystore file will be created at /path/to/keystore.
You can then use it via the --keystore <PATH> option for commands expecting a signer.
Alternatively, you can set the STARKNET_KEYSTORE environment variable to make command invocations easier:
export STARKNET_KEYSTORE="/path/to/keystore"
ℹ️ Note
Even when
STARKNET_KEYSTOREis set, it would be ignored by Starkli when any other signer option is supplied via the command line, including using the--keystore <PATH>option.
Plain text private keys
⚠️ Warning
Using plain text private keys is highly insecure. Never use this for production.
Plain text private keys are only intended to be used for development purposes, where security of keys does not matter. To generate a private key, run the command:
starkli signer gen-keypair
For commands that expect a signer, you can then use the --private-key <KEY> option. Alternatively, you can set the STARKNET_PRIVATE_KEY environment variable to make command invocations easier.
ℹ️ Note
Starkli shows a warning when you use plain-text private keys. If you know what you're doing, you can suppress this warning by setting the
STARKLI_NO_PLAIN_KEY_WARNINGto anything butfalse.
Accounts
Starkli sends out transactions through accounts. Starknet natively supports account abstraction and all accounts are smart contracts. Therefore, there are many "flavors" of accounts and Starkli supports the most popular ones. Starkli refers to these "flavors" as variants. See this section for the supported variants.
Accounts can be created and managed through the starkli account command. Variant-specific commands are available under starkli account <VARIANT> (where <VARIANT> is the unique identifier of the variant).
Supported account variants
The current version of Starkli supports these account variants (by alphabetical order):
Account creation
Before creating an account, you must first decide on the variant to use. As an example here, we will use the OpenZeppelin variant, whose identifier is oz.
All variants come with an init subcommand that creates an account file ready to be deployed. For example, to create an oz account:
starkli account oz init /path/to/account
ℹ️ Note
The
starkli account oz init <PATH>command requires a signer. Starkli would complain that a signer is missing when running the command as shown, unless a keystore is specified via theSTARKNET_KEYSTOREenvironment variable. See the signers page page for more details.
Account deployment
Once you have an account file, you can deploy the account contract with the starkli account deploy command. This command sends a DEPLOY_ACCOUNT transaction, which requires the account to be funded with some ETH for paying for the transaction fee.
For example, to deploy the account we just created:
starkli account deploy /path/to/account
ℹ️ Note
This command also requires a signer. You must provide the same signer used for creating the account file in the first place.
Unlike the
initcommand,deployneeds to access the network, so a provider must also be configured.
When run, the command shows the address where the contract will be deployed on, and instructs the user to fund the account before proceeding. Here's an example command output:
The estimated account deployment fee is 0.000011483579723913 ETH. However, to avoid failure, fund at least:
    0.000017225369585869 ETH
to the following address:
    0x01cf4d57ba01109f018dec3ea079a38fc08b789e03de4df937ddb9e8a0ff853a
Press [ENTER] once you've funded the address.
Once the account deployment transaction is confirmed, the account file will be update to reflect the deployment status. It can then be used for commands where an account is expected. You can pass the account either with the --account parameter, or with the STARKNET_ACCOUNT environment variable.
Account fetching
Account fetching allows recreating the account file from on-chain data alone. This could be helpful when:
- the account file is lost; or
- migrating an account from another tool/application.
The starkli account fetch commands creates an account file using just the address provided:
starkli account fetch <ADDRESS> --output /path/to/account
Running the command above creates the account file at /path/to/account.
Transaction fees
Historically, Starknet transaction fees could be paid with either ETH or STRK, as indicated by the transaction version used. However, since Starknet JSON-RPC spec version v0.8.0, the ability to send pre-v3 transactions (and thus pay fees with ETH) had been dropped. As a result, Starkli also no longer supports paying fees in ETH starting with release v0.4.0, where Starkli switched from spec v0.7.1 to v0.8.0.
ℹ️ Note
While JSON-RPC spec v0.8.0 dropped support for pre-v3 transactions, as of this writing they are still accepted by the Starknet network itself. If you need to send pre-v3 transactions, use a v0.3.x Starkli release.
This could be useful you are working with certain contracts that revert on v3 transactions. Do note that it's recommended that you upgrade these contracts to be v3-compatible, as pre-v3 transactions will eventually be disabled on the network itself.
Setting transaction fees manually
By default, Starkli requests a fee estimate from the provider, and a 50% buffer is added on top of the estimate to avoid failures due to price fluctuations. However, sometimes it might be desirable to manually specify the fees instead. Some common reasons to do this include:
- The fee estimation returned by the provider is inaccurate;
- You want to speed up command execution by skipping fee estimation; or
- The transaction in question is flaky, so the estimation might fail.
Setting STRK fees manually
In transactions that pay fees in STRK, the fee is made up of 6 components:
l1_gasl1_gas_pricel2_gasl2_gas_pricel1_data_gasl1_data_gas_price
These components indicate the maximum amount a user is willing to pay for a specific resource.
Each component has its own command line option for setting a manual value to be used:
l1_gas:--l1-gasl1_gas_price:--l1-gas-priceor--l1-gas-price-rawl2_gas:--l2-gasl2_gas_price:--l2-gas-priceor--l2-gas-price-rawl1_data_gas:--l1-data-gasl1_data_gas_price:--l1-data-gas-priceor--l1-data-gas-price-raw
To set any of the gas values, simply use its corresponding option. For example, to manually set a l1_gas value of 50000:
starkli invoke --strk eth transfer 0x1234 u256:100 --l1-gas 50000
💡 Tips
When all 3
gasoptions are manually set, Starkli does not perform a fee estimation and instead sources thegas_pricevalues directly from the pending block header. Therefore, transaction failure will not be detected until it's reverted on-chain.
To set any of the gas_price values, use any of its two options. The --xx-gas-price variant accepts a decimal value in STRK (18 decimals). For example, to set the L1 gas price at 0.0001 STRK:
starkli invoke --strk eth transfer 0x1234 u256:100 --l1-gas-price 0.0001
Alternatively, the ‐‐xx-gas-price-raw variant can be used for raw price values in FRI (the smallest unit of STRK). This command is equivalent to the one shown above:
starkli invoke --strk eth transfer 0x1234 u256:100 --l1-gas-price-raw 100000000000000
💡 Tips
Even when all
gas_priceoptions are manually set, as long as any of thegasoptions is not set, Starkli will still perform a fee estimation to determine how much gas is needed.
Estimating the fee only (dry run)
Commands that send out transactions accept a --estimate-only flag, which stops command execution as soon as an estimate is generated.
An example command to estimate the fee for an ETH transfer:
starkli invoke eth transfer 0x1234 u256:100 --estimate-only
Argument resolution
To make argument input easier and less error-prone, Starkli supports argument resolution, the process of expanding simple, human-readable input into actual field element arguments expected by the network.
By default, arguments are only parsed as raw field elements, accepting both decimal and hexadecimal representations.
To make arguments expandable, and thus trigger the resolution process, use the format scheme:content, where scheme is one of the supported schemes, and content is the scheme-specific content.
Schemes
addr
The addr scheme resolves the address name provided as content into a full address using an address book under the current network ID. As of this writing, the actual address book feature hasn't been implemented, and a hard-coded address book is used instead, which contains only one entry eth for the ETH token address.
u256
The u256 scheme interprets content as an unsigned 256-bit integer and resolves into 2 field element arguments for the low and high 128 bits, respectively. This scheme is useful for working with contracts expecting u256 arguments, such as the standard ERC20 contract.
str
The str scheme encodes content as Cairo short string.
const
The const scheme uses content as the key to look up a hard-coded table to commonly used constant values. The current list of constants are:
| Key | Value |
|---|---|
u256_max | 0xffffffffffffffffffffffffffffffff, 0xffffffffffffffffffffffffffffffff |
felt_max | 0x0800000000000011000000000000000000000000000000000000000000000000 |
selector
The selector scheme calculates the Starknet Keccak hash for the content to derive the function entryponit.
storage
This scheme is currently the same as selector, but support for offsets and maps (e.g. ERC20_balances[0x1234]) might be added in the future to differentiate it.
bytearray
The bytearray scheme encodes a list of bytes in the format of the ByteArray Cairo type.
The simplest use of this scheme is by supplying a hexadecimal representation of the raw bytes. Example: bytearray:0x1234.
Since a common use of the ByteArray type is to encode strings, the bytearray scheme has support for that too. To use it, simply prepend str: to the value. For example, bytearray:str:hello is equivalent to bytearray:0x68656c6c6f, which is eventually encoded into [0x0, 0x68656c6c6f, 0x5].
Scheme omission
Normally, the scheme: prefix is required for opting in to argument resolution. However, there are a few exceptions:
- the
addr:prefix can be omitted when an address is expected; - the
selector:prefix can be omitted when a selector is expected; - the
storage:prefix can be omitted in thestarkli storagecommand.
As an example, consider the starkli invoke command. To use the addr and selector schemes, one would run:
starkli invoke addr:eth selector:transfer ...
However, since the first positional argument for the starkli invoke is always expected to be an address, and the second one a selector, this command can be simplified into:
starkli invoke eth transfer ...
EIP-2645 wallet paths
Ledger derives its private keys based on Hierarchical Deterministic Wallets derivation paths (HD paths), allowing a single Ledger device to use an unlimited number of keys. HD paths can be thought of as IDs of keys. The same combination of Ledger seed phrase + path would always result in the same key pair.
Therefore, it's important to decide on, and document the HD paths to use for your accounts. While it's trivial to use a keypair given an HD path, the reverse is not true. It could be extremely difficult to figure out which HD path corresonds to a certain public key. It's therefore recommended that you follow established patterns of path management (e.g. using incremental numbers staring from zero), and document the paths used.
The EIP-2645 standard
If you've used hardware wallets in the past, you might already be familiar with the concept of HD paths, which might look like this: m/44'/60'/0'/0/0. Notably, this path would not work with the Starknet Ledger app, as the app only works with a specific path format known as EIP-2645 HD paths.
An EIP-2645 takes the format of:
m/2645'/layer'/application'/eth_address_1'/eth_address_2'/index
where layer, application, eth_address_1, eth_address_2, and index are 31-bit unsigned numbers.
The Starkli extension
EIP-2645 paths are difficult to write (e.g. m/2645'/1195502025'/1470455285'/0'/0'/0). Therefore, Starkli provides an extension to the standard to enhance the ease of use.
ℹ️ Note
These additional convenience are a Starkli-only extension, and paths written this way would not work with other HD wallet software (including
starknet-rs). To obtain a standard, universal path representation, Starkli provides thestarkli eip2645 echocommand:starkli eip2645 echo "m//starknet'/starkli'/0'/0'/5"which would output
m/2645'/1195502025'/1470455285'/0'/0'/5, a path representation that's universally accepted. It's also apparent how Starkli's format is much more user-friendly.
Using non-numerical strings
As per the EIP-2645 standard, layer and application are defined as hashes of the names of layer and application. Instead of having to manually calculate the hashes and writing error-prone numbers, Starkli provides an extension to the standard that allows users to fill in non-numerical strings, which would be automatically converted into numbers.
An example of such a path under the Starkli extension would be:
m/2645'/starknet'/starkli'/0'/0'/0
Omitting the 2645' segment
Since Starkli only works with EIP-2645 paths, and these paths always start with the first level as 2645', Starkli allows leaving the first level empty, like so:
m//starknet'/starkli'/0'/0'/0
Path management best practices
The single most important rule of path management is to document the paths you've used, especially if you use exotic paths that are not typically used (and hence key discovery algorithms wouldn't find them).
In terms of deciding on path levels, a widely agreed-upon path management pattern has not been established. Starkli recommends:
- always using the
m//starknet'/starkli'prefix for the first 3 levels; - keeping the
eth_address_1level constant at0'; - starting the
eth_address_2level from0'for your first account, and incrementing or more accounts; - keeping the
indexlevel at0.
ℹ️ Note
Some might suggest that it's best to keep both
eth_address_1andeth_address_2at0'and only ever incrementindex. However, doing so has a (very small) security risk of having the entire set of keys compromised if:
- any private key in the set is compromised; and
- the attacker has access to the
xpubkey on theeth_address_2level.While the risk is rather small, Starkli would still recommend using
eth_address_2as the counter instead.
ℹ️ Note
In the original EIP-2645 standard, the levels
eth_address_1andeth_address_2are for identifying the layer-1 address, assuming a layer-2 user would always start with some layer-1 account.This might be true for services like StarkEx, but is apparently not applicable to Starknet. Therefore, the original purpose of these 2 levels are discarded here.
Ledger hardware wallet
Starkli has first-class support for Ledger wallets (even works on Android via Termux). They can be used anywhere a signer is expected. Ledger-specific commands are also available to fully utilize the hardware wallet.
ℹ️ Note
As of this writing, the latest version of the Starknet Ledger app (
v1.1.1) only supports blind signing a single hash. While not ideal, it's the most secure signer available.
Installing the Ledger app
The first step of using Ledger is to install the Starknet Ledger app, as the Ethereum app cannot be used with Starknet.
You can verify that you've successfully installed the app by launching it:

💡 Tips
Make sure your Starknet app is launched when interacting with it from Starkli, or a connection error would occur.
Installing via Ledger Live
Since the Starknet Ledger app is still experimental (until it stops relying on blind signing), you must explicitly allow experimental apps in Ledger Live to install it.
In Ledger Live (mobile or desktop), go to Settings - Developer and turn on Allow experimental apps.
Connect your Ledger device to Ledger Live. From the Ledger Live interface, search for the Starknet app. Then simply click the install button to install the app.
ℹ️ Note
Issues have been reported where the Starknet app wouldn't show up in the app catalog even with Allow experimental apps turned on. In this case, you might want to try installing via command line, but note that the app installed this way isn't signed by Ledger.
It's also been reported that an available app update would be shown when connecting the device to Ledger Live again after a command line installation, allowing the unsigned app to be upgraded to the signed version.
Installing via command line
⚠️ Warning
The Starknet app installed this way is not signed by Ledger. Only do this when installing via Ledger Live does not work.
To install via command line, you must first obtain the compiled Starknet app artifact. Unfortunately, at this time, Ledger has only provided built artifacts for Ledger Nano S+ devices on GitHub. You may download these files of the latest (as of this writing) release from here:
app.hexapp_nanoplus.jsonstarknet_small.gif
For other Ledger devices, you can manually compile the project to obtain the compiled artifact, which is out of scope of the Starkli book.
Besides the app files, you'll also need to have ledgerctl installed and the ledgerctl command executable.
Then, connect your Ledger device and leave the dashboard page open. Do not launch any app.
Now run this command from the folder containing the 3 files above:
ledgerctl install -f app_nanoplus.json
You'll be prompted on your Ledger device to "allow unsafe manager", and enter your PIN again when confirming the installation.
Once installed, you can use the Starknet normally, with the caveat that a "this app is not genuine" message will be shown each time you launch the app, as the app is not signed by Ledger.
Checking app version
Getting the Ledger app version from Starkli is a simple and effective way to verify that Starkli can work correctly with your Ledger device. With the Starknet Ledger app launched, simply run:
starkli ledger app-version
Starkli should print the app version (e.g. 1.1.1) to the console.
Deciding on wallet paths
Before you actually start using the Ledger app, you must decide on what's known as "wallet paths" to be used with your accounts.
Specifically, the Starknet Ledger app uses EIP-2645 HD paths. Learn more about EIP-2645 wallet paths on this page.
Getting public key
Once you've decided on the path to be used, you can use Starkli to read its corresponding public key. For example:
starkli ledger get-public-key "m//starknet'/starkli'/0'/0'/0"
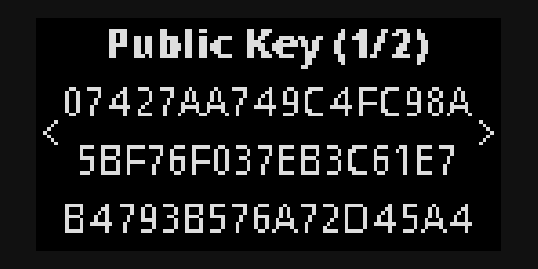
By default, the public key is shown on the Ledger device for manual confirmation:

You can also disable the on-device confirmation by using the --no-display option:
starkli ledger get-public-key "m//starknet'/starkli'/0'/0'/0" --no-display
Using as signer
The most common use case of using Ledger with Starkli is for controlling Starknet accounts. You can use Ledger as a signer for anything that requires a signer:
- initializing and deploying accounts;
- declaring classes;
- deploying and invoking contracts.
To use Ledger as signer, simply use the --ledger-path <HD_PATH> option, similar to how the --keystore option is used for encrypted keystores. For example:
starkli invoke --ledger-path "m//starknet'/starkli'/0'/0'/0" eth transfer 0x1234 u256:100 -w
A confirmation screen similar to this one below will be displayed on the Ledger device asking for approval:

Once approved, the transaction will be sent out and Starkli would wait for its confirmation, the same as how it works with other types of signers.
It's possible to simplify the command by using the STARKNET_LEDGER_PATH environment variable:
export STARKNET_LEDGER_PATH="m//starknet'/starkli'/0'/0'/0"
Then the same command above can instead be written as:
starkli invoke eth transfer 0x1234 u256:100 -w
Signing raw hashes
⚠️ Warning
Blind signing a raw hash could be dangerous. Make sure you ONLY sign hashes from trusted sources. If you're sending transactions, use Ledger as a signer instead of using this command.
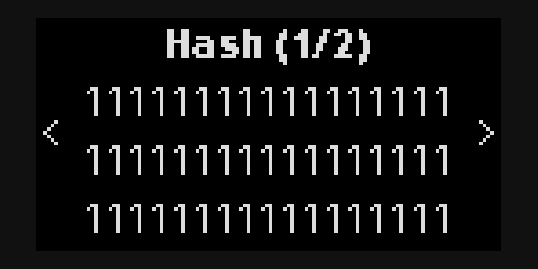
Starkli also allows you to sign a single raw hash with your Ledger device:
starkli ledger sign-hash --path "m//starknet'/starkli'/0'/0'/0" 0x0111111111111111111111111111111111111111111111111111111111111111
Once approved, the signature will be printed to the console.
Declaring classes
In Starknet, all deployed contracts are instances of certain declared classes. Therefore, the first step of deploying a contract is declaring a class, if it hasn't been declared already.
With Starkli, this is done with the starkli declare command.
ℹ️ Note
You need both a signer and an account for this. The commands shown in this page omit the signer and account options for better readability, and assume you've properly configured the environment variables.
You can declare Sierra classes, which are the output of the starknet-compile command, or target/dev/xxxx.contract_class.json files if you're using Scarb.
ℹ️ Note
Starting from Starkli v0.4.0, declaring Cairo 0 (legacy) classes is no longer supported. To declare such a class, use a v0.3.x Starkli release instead.
To declare any class, simply run:
starkli declare /path/to/class/file
Once the declaration is successful, Starkli displays the class hash declared. The class hash is needed for deploying contracts.
Sierra class compilation
When declaring Sierra classes, Starknet requires a so-called CASM hash to be provided. This is important because as of this writing, the Sierra-to-CASM compilation process isn't proven by the OS. Should the CASM hash not be provided and signed by the user, a malicious sequencer would be able to claim anything to be the CASM output, effectively deploying arbitrary code.
To come up with the CASM hash, Starkli compiles the Sierra class provided under the hood. Starkli ships with different versions of Sierra compilers built-in so that declaration does not depend on Cairo toolchain installation.
ℹ️ Note
If you encounter an error similar to
unsupported Sierra version: x.y.z, try upgrading Starkli, or file a bug if you're already on the latest release.
ℹ️ Note
For advanced users, it's possible to skip the Sierra-to-CASM compilation process by directly providing a
--casm-hash <CASM_HASH>.
Redeclaring classes
While the normal process of declaring a class involves getting the compiled contract artifact from the compiler and following the steps documented above, it's sometimes helpful to redeclare a class you found from another network.
To do so, simply run starkli declare on any class fetched from class-at or class-by-hash commands. For example:
starkli class-by-hash --network sepolia SOME_CLASS_HASH_HERE > class.json
starkli declare --network mainnet ./class.json
💡 Tips
While Starkli is capable of handling its declaration, the class format retrieved from JSON-RPC is different from the original compiler output. To obtain the format identical to what comes out of the compiler, use the
--parseflag when retrieving the class (e.g. in aclass-by-hashcommand).Note that while
--parseshould work just fine most of the time, unfortunately, certain exotic classes might not be parsable. Nevertheless, Starkli would still be able to redeclare the format without parsing.
Deploying contracts
Once you obtain a class hash by declaring a class, it's possible to deploy instances of the class.
With Starkli, this is done with the starkli deploy command.
ℹ️ Note
You need both a signer and an account for this. The commands shown in this page omit the signer and account options for better readability, and assume you've properly configured the environment variables.
To deploy a contract with class hash <CLASS_HASH>, simply run:
starkli deploy <CLASS_HASH> <CTOR_ARGS>
where <CTOR_ARGS> is the list of constructor arguments, if any.
💡 Tips
You might be able to leverage argument resolution to simplify the argument list input.
Under the hood, Starkli sends an INVOKE transaction to the Universal Deployer Contract, as Starknet does not support native external contract deployment transactions.
Invoking contracts
With Starkli, this is done with the starkli invoke command.
ℹ️ Note
You need both a signer and an account for this. The commands shown in this page omit the signer and account options for better readability, and assume you've properly configured the environment variables.
The basic format of a starkli invoke command is the following:
starkli invoke <ADDRESS> <SELECTOR> <ARGS>
For example, to transfer 100 Wei of the ETH token to the address 0x1234, one can run:
starkli invoke 0x049d36570d4e46f48e99674bd3fcc84644ddd6b96f7c741b1562b82f9e004dc7 transfer 0x1234 100 0
ℹ️ Note
The
transferfunction takes 2 parameters (i.e.recipientandamount) but we actually need to enter 3 (note the0at the end). This is becauseamountis of typeu256, which consists of 2 raw field elements.See the simplifying invoke commands section below for ways to make entering this command easier.
Simplifying invoke commands
You might be able to simplify invoke commands by leveraging argument resolution. In this section, we will take the ETH transfer command above and try to simplify it.
First, since the 0x049d36570d4e46f48e99674bd3fcc84644ddd6b96f7c741b1562b82f9e004dc7 address is a well-known address available on the built-in address book as the eth entry, we can replace it with the use of the addr scheme:
starkli invoke addr:eth transfer 0x1234 100 0
Furthermore, as the addr:eth is the first positional argument in an invoke command, it's eligible for scheme omission, which means we can further simplify it by dropping the addr: prefix:
starkli invoke eth transfer 0x1234 100 0
Manually entering u256 values as 2 separate field element values is tedious and error-prone, especially with larger values. We can leverage the u256 scheme to have Starkli automatically split the values for us:
starkli invoke eth transfer 0x1234 u256:100
For more information regarding argument resolution, check out the argument resolution page.
Multicall support
Starkli has seamless support for multicall. To use more than 1 contract call in an invoke command, simply separate the calls with /.
For example, to also approve the sending of 300 Wei for address 0x4321 in the same transaction:
starkli invoke eth transfer 0x1234 u256:100 / eth approve 0x4321 u256:300
Starkli 101
In this tutorial, you will be guided from scratch to deploy contracts on the Starknet testnet.
- Preparing your cryptographic keys and account.
- Compiling your Cairo contract with a simple example contract.
- Declaring a new class on Starknet.
- Deploying a contract instance of a class on Starknet.
ℹ️ Note
To make it easier to get started, this tutorial skips the step of choosing a provider and uses the
sepolianetwork fallback with free RPC vendor, but relying on the network fallback is discouraged in practice.Make sure to visit the providers page to learn more once you finish the tutorial.
Prepare a signer and an account
To interact with the network, you need an account to sign transactions. This tutorial assumes that you have no signer or account setup.
Initialize a signer
The signer is in charge of signing transactions. You can create a new pair of cryptographic key, or import an existing private key. Check out the signers page for more details.
Let's create a new signer here.
$ starkli signer keystore new /path/to/key.json
This will prompt you to enter a password and save your encrypted private key into the key.json keystore file.
To then use this keystore at each command, you can export the environment variable like:
$ export STARKNET_KEYSTORE="/path/to/key.json"
Initialize an account
We then initialize a new account, using OpenZeppelin class already declared on Starknet:
$ starkli account oz init /path/to/account.json
ℹ️ Note
Note that we didn't need to pass the
--keystoreoption since theSTARKNET_KEYSTOREenvironment variable is already set.
Fund and deploy the account
Up to this point, only the parameters for deploying the account have been generated, but the account itself hasn't been deployed yet. You must deploy the account to be able to use it.
To deploy the account, run:
$ starkli account deploy /path/to/account.json
The command would then displays a message similar to this:
The estimated account deployment fee is 0.000004323000964029 ETH. However, to avoid failure, fund at least:
    0.000006484501446043 ETH
to the following address:
    0x077c********************************************************3f8a
Press [ENTER] once you've funded the address.
ℹ️ Note
The address above is redacted just in case you accidentally send funds to it.
As instructed, you must pre-fund the address with ETH to be able to continue. Send enough ETH to the address, and then press the Enter key.
💡 Tips
You can use the
starkli balancecommand (probably in a separate terminal session) to check whether the destinated account address has been successfully funded.
An account deployment transaction will be sent out. Once the transaction is confirmed, your account will be ready to use.
Again, to avoid having to pass the account file to each command invocation, we can export the STARKNET_ACCOUNT variable:
$ export STARKNET_ACCOUNT="/path/to/account.json"
For more details about accounts, please refer to the accounts page.
Compile your Cairo contract
The next step is to compile a Cairo contract. There are a few options for compiling Cairo contracts, but in this tutorial, we'll use Scarb.
ℹ️ Note
This tutorial uses Scarb
v0.6.1.
First, create a Scrab project:
$ mkdir my_contract
$ cd ./my_contract/
$ scarb init
Update the Scarb.toml file to include the starknet dependency and add the starknet-contract target:
[package]
name = "my_contract"
version = "0.1.0"

[dependencies]
starknet = "=2.1.0"

[[target.starknet-contract]]
Then, replace the ./src/lib.cairo file with the following content:
#![allow(unused)]
fn main() {
// ** ./src/lib.cairo **

#[starknet::interface]
trait MyContractInterface<T> {
    fn name_get(self: @T) -> felt252;
    fn name_set(ref self: T, name: felt252);
}

#[starknet::contract]
mod my_contract {
    #[storage]
    struct Storage {
        name: felt252,
    }

    #[event]
    #[derive(Drop, starknet::Event)]
    enum Event {
        NameChanged: NameChanged,
    }

    #[derive(Drop, starknet::Event)]
    struct NameChanged {
        previous: felt252,
        current: felt252,
    }

    #[constructor]
    fn constructor(ref self: ContractState, name: felt252) {
        self.name.write(name);
    }

    #[external(v0)]
    impl MyContract of super::MyContractInterface<ContractState> {
        fn name_get(self: @ContractState) -> felt252 {
            self.name.read()
        }

        fn name_set(ref self: ContractState, name: felt252) {
            let previous = self.name.read();
            self.name.write(name);
            self.emit(NameChanged { previous, current: name });
        }
    }
}
}
Now build the contract:
$ scarb build
and the built contract artifact (aka. Sierra class) will be available at ./target/dev/my_contract_my_contract.sierra.json.
Declare the new class
Contract classes are like blueprints where actual contract instances can be deployed from. Now it's time to declare the new Sierra class. To declare, simply run:
$ starkli declare --watch ./target/dev/my_contract_my_contract.sierra.json
ℹ️ Note
If the class hash already exists, Starkli will not send out a declaration transaction.
This is not considered an error, but if you want to try a declaration anyways, you can do so by making your class slightly different by changing the Cairo code.
Starkli will then output the Cairo 1 class hash (which can also be obtained using the starkli class-hash <FILE.json> command). You'll need this class hash for deploying the contract.
If you followed the exact same steps with the exact same tooling versions, you should be getting the class hash of 0x0756ea65987892072b836b9a56027230bbe8fbed5e0370cff22778d071a0798e. It's normal that you arrive at a different hash, so don't worry about that.
Deploy your contract
Once your new class is declared, you can deploy an instance of your contract. Concrete contract instances hold state (storage values) while classes (what you declared at the last step) define the logic.
With Starkli, this is done via the deploy command. To deploy, you will need the class hash obtained in the last step when declaring. Apart from the hash, you will also need to pass the constructor arguments to your contract:
$ starkli deploy <CLASS_HASH> <CTOR_ARGS>
In the case of my_contract we declared above, the contract is expecting a single felt252 to be used as the name. A common way to represent strings as felt252 is to use the Cairo short string format. For example, you can find the Cairo short string representation of "starkli" with the to-cairo-string command:
$ starkli to-cairo-string starkli
0x737461726b6c69
You can use this value directly as an argument to deploy the contract:
$ starkli deploy --watch 0x0756ea65987892072b836b9a56027230bbe8fbed5e0370cff22778d071a0798e 0x737461726b6c69
💡 Tips
You can leverage argument resolution to simplify the argument list:
$ starkli deploy --watch 0x0756ea65987892072b836b9a56027230bbe8fbed5e0370cff22778d071a0798e str:starkliNote how
0x737461726b6c69is replaced withstr:starkli. Learn more about argument resolution here.
Starkli prints the deployed contract address in the command output. You can use the address for interacting with the deployed contract.
Here we will use the address 0x06d8e1f3ed72fc87aa896639a0f50a4b9e59adb24de8a42b477957e1a7996e1b. You will get a different address when you deploy the contract yourself. Simply replace the addresses in the following commands with your own.
Let's query the current name set for the contract:
$ starkli call 0x06d8e1f3ed72fc87aa896639a0f50a4b9e59adb24de8a42b477957e1a7996e1b name_get
[
    "0x00000000000000000000000000000000000000000000000000737461726b6c69"
]
which is the Cairo short string representation of the text "starkli".
Let's change it to "starknet" instead:
$ starkli invoke --watch 0x06d8e1f3ed72fc87aa896639a0f50a4b9e59adb24de8a42b477957e1a7996e1b name_set str:starknet
Now query the name again:
$ starkli call 0x06d8e1f3ed72fc87aa896639a0f50a4b9e59adb24de8a42b477957e1a7996e1b name_get
[
    "0x000000000000000000000000000000000000000000000000737461726b6e6574"
]
And the name returned has changed. We've successfully modified the state of our contract.
Commands
Starkli offers the following commands:
- selector
- class-hash
- to-cairo-string
- parse-cairo-string
- mont
- call
- transaction
- block-number
- block-hash
- block
- block-time
- state-update
- transaction-receipt
- chain-id
- balance
- nonce
- storage
- class-hash-at
- class-by-hash
- class-at
- syncing
- signer
- account
- invoke
- declare
- deploy
- completions
To check usage of each command, run with the --help option.
🏗️ TODO
Document each command instead of asking users to run
--help.