Ledger hardware wallet
Starkli has first-class support for Ledger wallets (even works on Android via Termux). They can be used anywhere a signer is expected. Ledger-specific commands are also available to fully utilize the hardware wallet.
ℹ️ Note
As of this writing, the latest version of the Starknet Ledger app (
v1.1.1) only supports blind signing a single hash. While not ideal, it's the most secure signer available.
Installing the Ledger app
The first step of using Ledger is to install the Starknet Ledger app, as the Ethereum app cannot be used with Starknet.
You can verify that you've successfully installed the app by launching it:

💡 Tips
Make sure your Starknet app is launched when interacting with it from Starkli, or a connection error would occur.
Installing via Ledger Live
Since the Starknet Ledger app is still experimental (until it stops relying on blind signing), you must explicitly allow experimental apps in Ledger Live to install it.
In Ledger Live (mobile or desktop), go to Settings - Developer and turn on Allow experimental apps.
Connect your Ledger device to Ledger Live. From the Ledger Live interface, search for the Starknet app. Then simply click the install button to install the app.
ℹ️ Note
Issues have been reported where the Starknet app wouldn't show up in the app catalog even with Allow experimental apps turned on. In this case, you might want to try installing via command line, but note that the app installed this way isn't signed by Ledger.
It's also been reported that an available app update would be shown when connecting the device to Ledger Live again after a command line installation, allowing the unsigned app to be upgraded to the signed version.
Installing via command line
⚠️ Warning
The Starknet app installed this way is not signed by Ledger. Only do this when installing via Ledger Live does not work.
To install via command line, you must first obtain the compiled Starknet app artifact. Unfortunately, at this time, Ledger has only provided built artifacts for Ledger Nano S+ devices on GitHub. You may download these files of the latest (as of this writing) release from here:
app.hexapp_nanoplus.jsonstarknet_small.gif
For other Ledger devices, you can manually compile the project to obtain the compiled artifact, which is out of scope of the Starkli book.
Besides the app files, you'll also need to have ledgerctl installed and the ledgerctl command executable.
Then, connect your Ledger device and leave the dashboard page open. Do not launch any app.
Now run this command from the folder containing the 3 files above:
ledgerctl install -f app_nanoplus.json
You'll be prompted on your Ledger device to "allow unsafe manager", and enter your PIN again when confirming the installation.
Once installed, you can use the Starknet normally, with the caveat that a "this app is not genuine" message will be shown each time you launch the app, as the app is not signed by Ledger.
Checking app version
Getting the Ledger app version from Starkli is a simple and effective way to verify that Starkli can work correctly with your Ledger device. With the Starknet Ledger app launched, simply run:
starkli ledger app-version
Starkli should print the app version (e.g. 1.1.1) to the console.
Deciding on wallet paths
Before you actually start using the Ledger app, you must decide on what's known as "wallet paths" to be used with your accounts.
Specifically, the Starknet Ledger app uses EIP-2645 HD paths. Learn more about EIP-2645 wallet paths on this page.
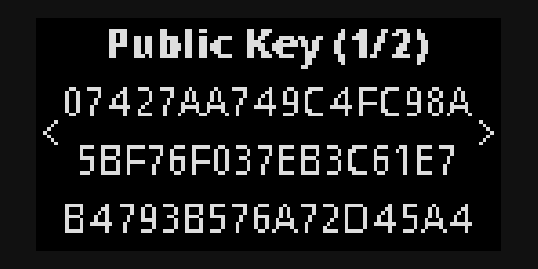
Getting public key
Once you've decided on the path to be used, you can use Starkli to read its corresponding public key. For example:
starkli ledger get-public-key "m//starknet'/starkli'/0'/0'/0"
By default, the public key is shown on the Ledger device for manual confirmation:

You can also disable the on-device confirmation by using the --no-display option:
starkli ledger get-public-key "m//starknet'/starkli'/0'/0'/0" --no-display
Using as signer
The most common use case of using Ledger with Starkli is for controlling Starknet accounts. You can use Ledger as a signer for anything that requires a signer:
- initializing and deploying accounts;
- declaring classes;
- deploying and invoking contracts.
To use Ledger as signer, simply use the --ledger-path <HD_PATH> option, similar to how the --keystore option is used for encrypted keystores. For example:
starkli invoke --ledger-path "m//starknet'/starkli'/0'/0'/0" eth transfer 0x1234 u256:100 -w
A confirmation screen similar to this one below will be displayed on the Ledger device asking for approval:
Once approved, the transaction will be sent out and Starkli would wait for its confirmation, the same as how it works with other types of signers.
It's possible to simplify the command by using the STARKNET_LEDGER_PATH environment variable:
export STARKNET_LEDGER_PATH="m//starknet'/starkli'/0'/0'/0"
Then the same command above can instead be written as:
starkli invoke eth transfer 0x1234 u256:100 -w
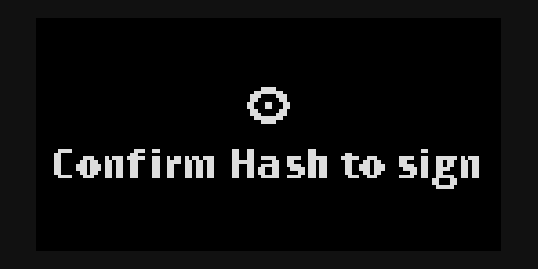
Signing raw hashes
⚠️ Warning
Blind signing a raw hash could be dangerous. Make sure you ONLY sign hashes from trusted sources. If you're sending transactions, use Ledger as a signer instead of using this command.
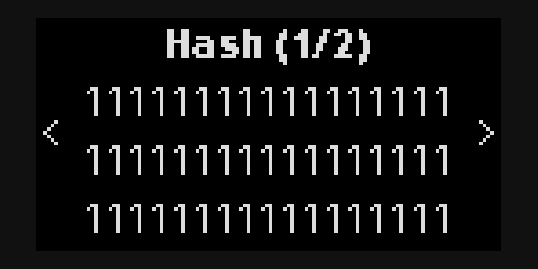
Starkli also allows you to sign a single raw hash with your Ledger device:
starkli ledger sign-hash --path "m//starknet'/starkli'/0'/0'/0" 0x0111111111111111111111111111111111111111111111111111111111111111
Once approved, the signature will be printed to the console.